Showing posts with label Photo Tutorial. Show all posts

Tuesday 24 March 2015

Photo tutorial by Fiona Paltridge
{Design Team 'Moment To Shine'}

Hello again!  It's Heather McMahon back with you today to
 share our fabulous March photo tutorial by our super-talented Design Team 
member Fiona Paltridge from Australia. Fiona is sharing how she created
 this stunning layout, inspired by our current challenge here.

Please let Fiona know what you think by leaving a comment!


 Fiona was inspired by the colours, chevrons & quote from the current mood board.


Here's an update on Fiona:


"Hi! My name is Fiona & I live in South Australia with my husband.
I have 2 adult children who have both moved away to pursue their careers.
I have been a scrapbooker for almost 15 years now but I have only recently
discovered the online world of challenges & design teams! 

I'm enjoying meeting so many amazing & talented people & having a chance
to share my love of creating as well as being exposed to a never-ending stream
of ideas, techniques & wonderful creations from my online compatriots.

My work is contemporary & I absolutely love using mixed media on my projects.
Since I've discovered modelling paste, gesso & watercolours I love using them
on everything I create! I currently design for 4 other teams ranging from a kit club to a challenge blog & a couple of product companies. I am also a current Scrapbooking Memories Master.

I am loving being part of SATW & enjoying sharing my love of creating with you all. 
You can find my blog HERE."

----------------------------------------------------------------------


1. Begin by preparing your background paper with white or clear gesso. I used both 
as I wanted the white gesso to soften the background & the clear gesso to
 give it extra tooth for all the water colour I was about to add. Once it's dry,
 add some stenciling using white gesso mixed with Matt Gel Medium.


2. Once the stenciling is dry, add some colour using 13arts Chalk Sprays 
in pastel turquoise. Tip the paper up & allow it to drip. Use a small paint 
brush with water to spread some of the colour around the page.


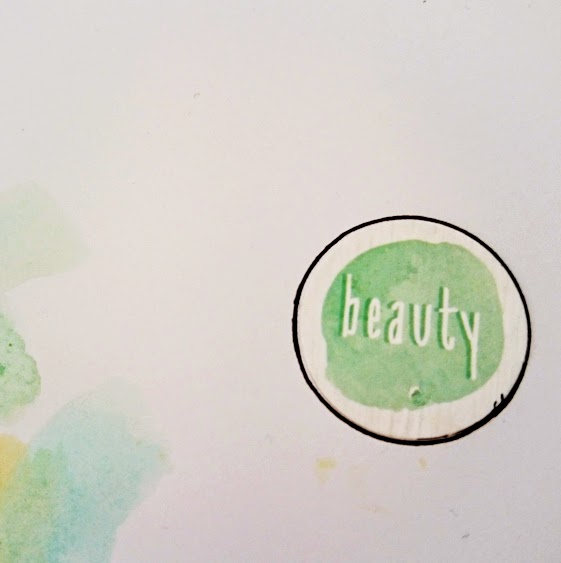
3. When dry, stamp with stamp sets designed by Kasia Krzyminska as these are 
perfect for adding a hand drawn look to the background.


4. Add some papers to frame the photo & some washi tape to accentuate the "T" shape 
in the design. Add some white cotton under the photo.


5. Use blackboard paint to create contrast in the design. Smear a large 
section to write your title on with a white marker once it is dry.


6.  Add doodling with a black marker by tracing around some of  the triangle shapes created by the stencil & adding some square shapes similar to the stamp used on the background.


7. Add a splash of yellow by mixing a very small amount of Flat Shot powder 
with water & sprinkling it over the design. This powder is very 
pigmented so only a tiny amount is required.


Here are some close ups to show you the amazing detail on this project:


Fiona has used a stunning colour combination here.


The variety of textures & the hand-drawn look are strong features of this page.


The finished project is full of life and colour!


Products used:


SUPPLIES LIST

Patterned Paper - Glitz Design Dapper Dan collection Chevron,
various scraps & old book pages
 Gel medium, Gesso and Chalk Board Paint - Faber Castell
Mist - 13@rts Ayeeda "Pastel Turquoise"
 Flat Shots - Lindy's Stamp Gang "Pineapple Paradise"
Stamps - The Scrapbook Diaries Kasia Krzyminska 
(aka Czekoczyna) stamp sets 1 & 3
 Stencil - Clear Scraps
Embellishments - Tim Holtz Idea-ology, Prima Marketing Junkyard 
Findings by Ingvild Bolme & 2Crafty Chipboard
Washi tapes, white cotton & hemp twine
Pens - black felt tip marker & white ball point marker


Please leave a comment here for Fiona if you found this tutorial inspiring!

There is only 1 week left to get your entries in for this month's challenge! 
There are 11 awesome prizes up for grabs so be quick!

You can find the challenge details here.


Complied & posted by Heather McMahon


Monday 23 February 2015

Photo Tutorial by Sandra Przybylska
{Design Team 'Moment To Shine'}


Hello everyone! It's Heather McMahon here with you today to share our 
February photo tutorial by Design Team member Sandra Przybylska 
from the United Kingdom. Sandra is sharing how she created this 
simply stunning layout using our current challenge here.

Please let Sandra know what you think by leaving a comment!


Sandra was inspired by the quote & the colours of the current mood board.


Here's a reminder about Sandra & her bio:


"Hello! My name is Sandra Przybylska & I'm a mother of one lovely baby boy.
 I started scrapbooking in July 2013 & it has become my biggest passion.

 I love creating layouts, cards and Project Life pages as well as altered projects
 & art journal pages.  I always create with paints & stamps & can't live
without mixed media!  I cannot wait to be inspired here as well as to
 inspire you!  You can find my blog HERE."

 .......................................................................................


1. Take 4 colours of paint & mix each one with a bit of white.


2. Using a wet brush, roughly brush each colour onto the page.


3. Once the paint has dried, apply the stamp with black ink 
over 1 side of the painted area.


4. Glue the pocket page card & the photo in place.


5. Add the embellishments, starting with the floral piece.


6. Using a black pen, draw around the 2 circles (the top 'beauty' circle & 
bottom grey circle) & the pocket page card.


7. Lastly, add my favourite thing - splashes! Don't worry if you don't have mists, 
just use a brush & paint. I used black, blue & green.


8. The layout is complete!


Here are some closer views:


A few layers can make a strong impact.


Note the beautiful paint effect peeking through on the background.


Products Used :


SUPPLIES LIST

Cardstock - Kaisercraft white
Embellishments - Kaisercraft Collectables & 
Captured Moments card in 'Cherry Blossom'
Paints - Kaisercolours in  white, lime, 
sea breeze, grass green & pale beige
Stamp - Kaisercraft 'Sketchy'
Mists - Black, green & blue.


Please leave a comment here for Sandra if you found this tutorial inspiring!


There are only 5 days left to get your entries in for this month's challenge! 
There are 11 awesome prizes up for grabs so be quick!

You can find the challenge details here.

We also have our monthly FOLLOWER COMPETITION running HERE
so don't forget to enter if you haven't already. It also closes in 5 days!
You could win a $25 gift certificate without even creating a project!


Complied and posted by Heather McMahon


Saturday 24 January 2015

Photo Tutorial by Jaya Raghuvanshi
{Design Team 'Moment To Shine' }


Hello everyone!  Heather McMahon here with you today to
 share our January photo tutorial by Design Team member 
Jaya Raghuvanshi from India. Jaya is sharing how she created
 this stunning canvas, inspired by our current challenge HERE.


Jaya was inspired by the colours, blooms, clock images
 & metal elements of the current mood board. 


A reminder about Jaya & her bio:-


"Hello everyone! My name is Jaya Raghuvanshi & I am from India.
 I am 27 years of age & a dental surgeon by profession. 
Crafting, painting & pencil sketching have been my hobbies since childhood. 

I discovered paper crafts in 2012 & have been hooked on them since then.
 My style is a 'mixed bag' & I love to try anything new that comes my way. 
 I started with scrapbooking & began making canvases only recently. 
I find canvases the best way to express myself.

I'd love it if you stopped by my blog here & Facebook pages here & here."

---------------------------------------------------------------------------------------------------------


 1. Apply a generous coat of Mod Podge to adhere your
 patterned paper to the canvas. Let it air dry or use a heat gun.


2. Apply gesso on the base & heat dry.


3. Use your chosen stencils with your texture paste, 
to create some background texture.  


4. Adhere all your embellishments on the canvas. 
Once everything is in place add more stenciling if you feel it is required.  


5. Coat the embellishments with a generous amount of gesso. 
Use crackle texture paste around the flower clusters & edges of the canvas.


6. Use your mists & sprays to cover the embellishments. 
Repeat with alternate coats of gesso & sprays, as many
 times as necessary to achieve the desired result.  


Here are some close-ups...


Jaya created these amazing 3D dribble effects
 by using her hot glue gun.Pretty cool huh?!


The texture & detail in Jaya's work is incredible & canvases are the perfect 
place to have fun with flowers & embellishments without worrying about bulk.


Here is Jaya's finished masterpiece!


Products Used :-


SUPPLIES LIST

12" x 12" canvas - art store
Patterned paper - Kaisercraft Base Coat
 White heavy gesso & texture crackle paste - Prima 
Texture paste - Ranger
 White gelato - Faber Castell
Vibez - Shimmerz white mist
Stencils - Art is & Reverse chicken wire - The Crafter's Workshop
Sprays - Lindy's Starburst Hottie patottie hot pink, 
 Rambling rose red, Cotton candy pink & Shabby turbine teal
Magicals - Lindy's Autumn maple crimson & Queen of hearts red
 Embellishments -Shabby chic oval resin frame, Typo bulbs, 
Ingvild Bolme plate & Finnabair bottle cap - Prima
Other metal embellishments & flowers - stash

Please leave a comment here for Jaya if you found this tutorial inspiring!

There is only 1 week left to get your entries in for this month's challenge! 
There are 11 awesome prizes up for grabs so be quick!

You can find the challenge details here.

We also have our monthly FOLLOWER COMPETITION running HERE
so don't forget to enter if you haven't already!  It also closes in a week!!
You could win a $25 gift certificate without even creating a project!


COMPILED & POSTED BY HEATHER MCMAHON.


Friday 28 November 2014

Photo Tutorial by Alexandra Polyzou
{Design Team 'Moment to Shine'}


Hello everyone & welcome to our November photo tutorial by Design Team 
member Alexandra Polyzou from Greece. Alexandra is sharing how 
she created a journal page, using our current challenge here.

LET ALEXANDRA KNOW WHAT YOU THINK BY LEAVING A COMMENT!


Alexandra was inspired by the quote, the doilies & the colors of the current mood board.

 
A reminder about Alex & her bio :-


"Hi there! I'm Alexandra Polyzou & I'm thrilled to have been
 a part of the Scrap Around The World team since it's inception!

I'm from Greece & I'm a working woman, happily married to my 
wonderful hubby & I have 3 kids....a boy & 2 girls.

I'm creative by nature & love any kind of craft but scrapbooking is my favourite,
 my true passion! Ever since I discovered it 3 years ago it was love at first sight! 

I’m always searching for new ideas & techniques & I try to use & combine them
 on my  pages for an eclectic  style.   Scrapbooking my photos & seeing my family's
 memories displayed on paper & in projects is very important to me & why I do what I do.

 I'd love it if you visited my blog HERE & my Facebook page HERE.

 .......................................................................................
  1. Cut your patterned paper into small pieces then glue the pieces randomly onto your journal pages using gel medium, thus giving your pages some additional texture.


2. Cover almost all the surface with gesso then spray with 3 different colored mists.


3.  Add some stamping, a paper doily, a lace ribbon some gauze to create further texture 


4. Now decorated your  journal page spread with various embellishments.


 Here are some close-ups...


You can see the variety of textures below.


Using different stamps on the background adds detail & texture without adding bulk.
  This is especially important for a bound journal that has no capacity to expand
 on both sides, as it avoids a book with a thin spine that becomes very thick 
on the other side & difficult to close without a clasp or elastic.  


Here is the finished journal page


Products Used :-


SUPPLIES LIST

Papers - 13arts - Fly Away
Gesso - Ranger
Mists - 13arts - Pastel Mint, Pearl Yellow, 
Pearl Clear, Chalk Woodbine
Dylusions - Black
Inks - Hero Arts
Stamps - Prima 
Stickers - Studio Calico
Flowers - Prima
Other - lace ribbon, paper doily, 
button, brad, wooden frame

Please leave a comment here for Alexandra if you found this tutorial inspiring!

There are only 2 days left to enter the November challenge!
You are almost OUT OF TIME so if you want a chance to win
get your entries in in the next 48 hours!!

You can find the details here.